Planning for your next Planner!

Screen Shot 2015-08-14 at 2.28.11 PM

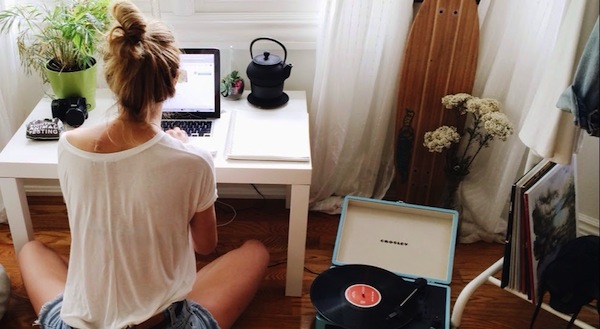
Hi everyone! Today I am talking to all you organize freaks out there like me!

One of my favorite times of the year is getting a new planner for the school semester/new year. This is my last semester of college ever! (Can’t believe it, if you are just starting college enjoy every minute of it cause it truly flies by!).  So I wanted to make sure I got the perfect planner. I have had experience with two great brands which I have listed below & also listed the new planner I just ordered which I am so excited to get in the mail.

My first “big girl” planner was from none other than the amazing Lily Pulitzer. I think every girl should have at least have one of these bad boys. I loved how big this agenda was. I got it a year ago and it still goes until December 2015! It was a year & a half long (& actually I could technically still be using it for this last semester — its that large — but I wanted a new planner for a fresh start hehe).

Screen Shot 2015-08-14 at 1.44.03 PMhttp://www.lillypulitzer.com/category/agendas/jumbo-agenda/pc/429/433.uts

Screen Shot 2015-08-14 at 1.27.08 PM

 Pros: 

  • Durable
  • Enough room to write under each day
  • Cute stickers (i.e. Mani/Pedi day, Date Night, Me Day etc.)

Cons:

  • The only reason I switched to a different planner was it wasn’t the best fit for a college student in my personal opinion. It was hard to separate each class and assignment and my OCD would really kick in when it looked all scattered.
  • A little pricier than most ($34)

Screen Shot 2015-08-14 at 1.44.11 PM

https://www.etsy.com/shop/PlumPaperDesigns

Screen Shot 2015-08-14 at 1.14.26 PM

Screen Shot 2015-08-14 at 1.14.48 PM

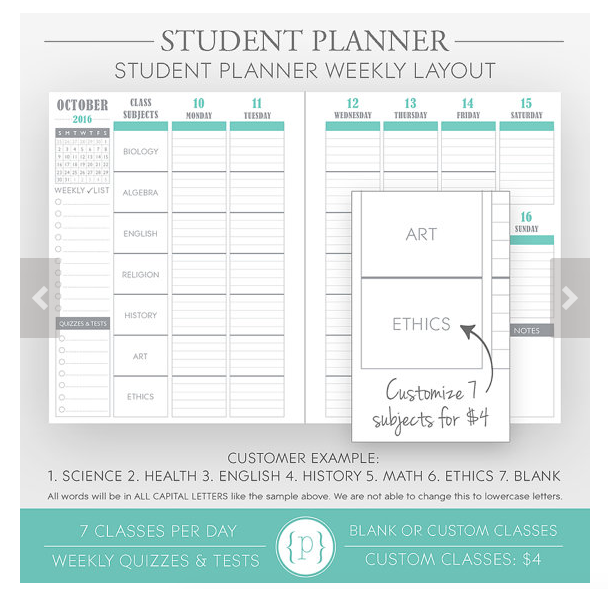
The above photo is THE number one reason to get this planner. It has been the best for writing down homework or when your next exam is. Hands down best college planner out there.

Pros:

  • CUSTOMIZATION! (name on front, adding classes, and stickers etc.)
  • Also durable
  • Great price
  • Custom class sections
  • They do more than just student planner. (wedding planners, teacher planners, parent planners etc.)

Cons:

  • Not great for other than school, needed two planners. (one for classes, one for other)
  • Not a fan of the outer designs (personal opinion)

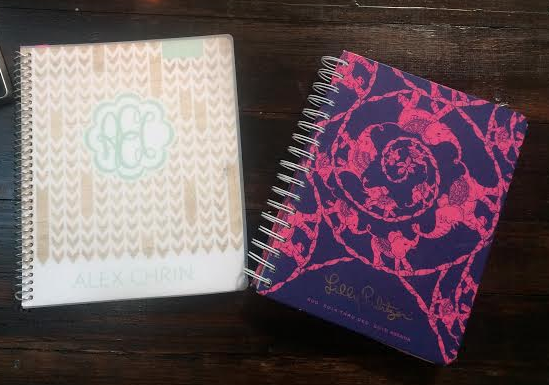
Below are the two that I have right now. You can see that the Lily Pulitzer planner is much larger! Both were great quality and have lasted for a year! The reason I got both was that while I am in college I needed more of a student based planner which Plum Paper designs is awesome for! But I also liked having one for separate life events and to do lists which Lily is great for.

Screen Shot 2015-08-14 at 1.41.23 PM

Screen Shot 2015-08-14 at 1.41.34 PM

Of course I am always looking for the  next best planner because let’s face it I love a good planner! And I have still not found the PERFECT one yet. So I have officially just ordered this one from BAN.DO. It looks great and at a reasonable price ($20). I cant wait until I get it and I will for sure post a review as soon as its here. I have a feeling I might just be obsessed with it!  (Yes I know above I wrote that Plum Papers is great for school and since I do have one more semester left I’m sure I might regret it, but just look how cute this one is!)

Screen Shot 2015-08-14 at 1.44.22 PM

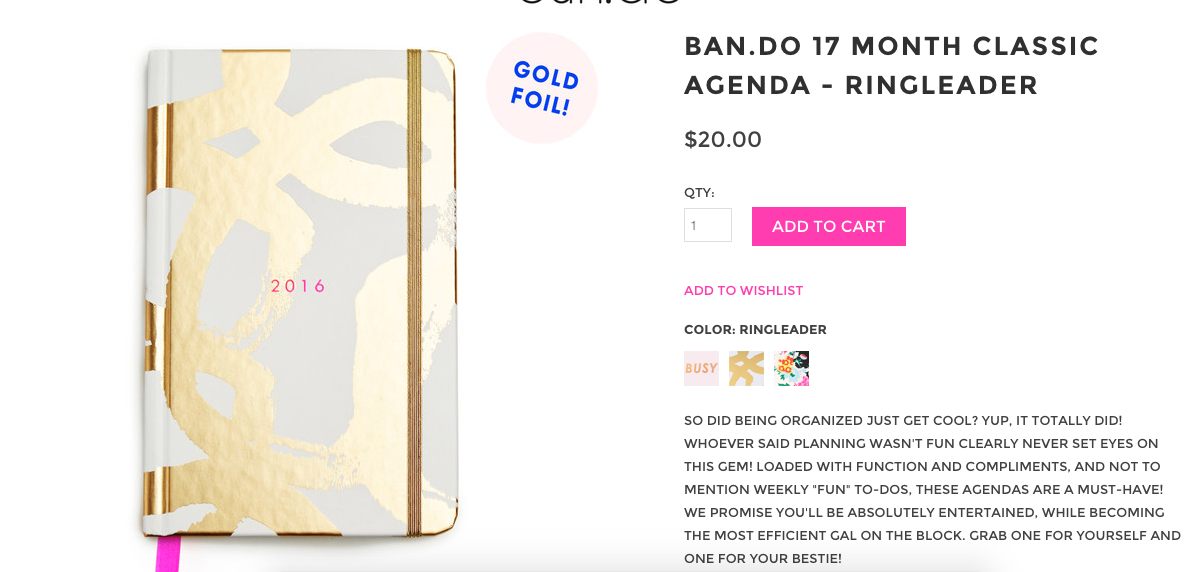
http://www.shopbando.com/collections/agendas

Screen Shot 2015-08-14 at 1.35.02 PM

Screen Shot 2015-08-14 at 1.35.33 PM

Screen Shot 2015-08-14 at 1.56.27 PM

Screen Shot 2015-08-14 at 1.35.42 PM

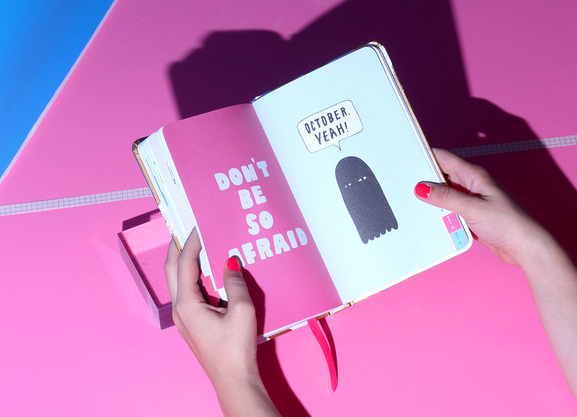
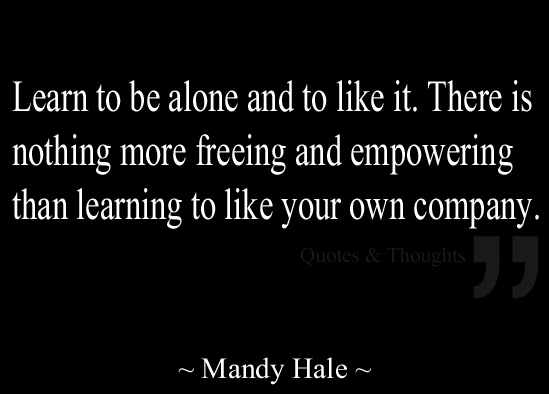
What really sold me was what they wrote at the bottom, so true! Organizing did get cool… haha. So cute!

Screen Shot 2015-08-14 at 1.52.34 PM

Let me know what planners you all use && what ones you love!

Again I will be sure to update you guys on what I think of the Ban.do planner when it arrives.

xoxo,

alex-signature

Why Living By Yourself is the Sh*t!

It’s finally happened! I have my own place. 

tumblr_n5y4y7DQGo1sn2thco1_1280

So it’s fitting that I stumbled upon this article from Elite Daily called “20 Reasons Every Girl Should Live By Herself At Least Once In Her 20s.” And I gotta say it’s spot on. To all you ladies who are either living by yourself now, looking forward to living by yourself or scared sh*tless to live on your own READ THIS ARTICLE! 

http://elitedaily.com/women/reasons-girl-live-alone-20s/805422/

I can honestly say from living with roommates all of college, this is all so true! Like the quote below says learning to depend on yourself and nobody else is so empowering.  

{Also if you haven’t checked out Elite Daily before & you are in your 20’s like myself, sign up now! I’ve never found more relatable articles! http://elitedaily.com/ } 

xo,

alex-signature

Screen Shot 2015-07-31 at 10.06.00 AM

DIY Don’t Forget Your Roots

Moving to a new state soon? If so this is a cute little way to remember your roots!

bigger 2

I have lived in Northern California my entire life and wanted to make a little something to remember where I came from. Also hopefully seeing this every day on my desk will motivate me to make my goal of moving to Denver a reality!

All you’ll need:

  • Frame: I got mine from Michaels ($9.99) & chose a floating style frame. But you can ultimately chose any style/size frame you want.

Screen Shot 2015-07-27 at 6.34.09 PM

  • Red Sharpie: To draw a heart next to the city you want (optional)
  • Print out states! 

I chose to only do two states, however you can do as many as you’d like.

  • I found the state images from google maps.

CALIFORNIA

 Screen Shot 2015-07-27 at 5.44.47 PM

COLORADO

Screen Shot 2015-07-27 at 5.45.17 PM

Print & Cut. Frame it up!

This was the DIY of the day. Enjoy!

xo,

alex-signature

DIY: DESIGN YOUR OWN MUGS WITH SHARPIES.

Good morning! Any coffee addicts or tea drinkers in the house? If so this might be a fun craft for you!

Screen Shot 2015-07-25 at 9.10.56 AM

I don’t know about you all, but my favorite thing about the morning is a nice cup of joe. Which means I have A LOT of coffee mugs. I love collecting mugs with funny sayings or from places I’ve been, but I hate paying $9.99-$16.00 for them! Especially when I can get perfectly fine mugs at the Dollar Store, but lets face it those ones are boring. So I had been hearing that you can make your own designs on mugs with sharpies and bake them in the oven to make the ink stay. I was intrigued…

I did a little research and people were writing that the ink didn’t last with normal sharpies, that you needed to buy special Oil-Based ones called “Sharpie Pen-Peinture.” I went down to my local Staples and picked up a pack.

Here is everything you will need:

  • Mugs (Dollar Store) $1
  • A Pencil
  • Sharpie Pen-Peinture $8.89 (make sure it is not regular sharpies or it will not stay)
  • An Oven

unnamed

  • I used the pencil to sketch the words on the mug, then went over it with the sharpie! I found all my mug designs on Pinterest.

unnamed (1)

  • Place in the oven for roughly 30 minutes at 350 degrees! Then let them cool off for another 30 minutes.

                   Now you can have personalized mugs anytime you want! 

The only downfall = *Not dishwasher safe. Must hand wash.

These make great (cheap) little gifts! Hope you Enjoyed!

xo,

alex-signature

Behind the Name

Hi all! 

Since I just started this blog I wanted to make sure to give you a little reasoning behind the blog name. Enjoy! 

As a woman we go through one, if not many heartbreaks and we all handle them differently. I myself have had my fair share. For me I often turn to the country singer Miranda Lambert. Her lyrics tend to put a lot of things in perspective for me. She has that ‘kick him to the curb’ attitude if a man isn’t treating you the way he should. Most importantly the way she portrays life is something I look up too. The kind of F#@% it I’m doing my own thing and I don’t care what any of ya’ll think. She sings about being a strong, sassy, independent woman. She’s badass and who wouldn’t want to be her!

So one of my favorite songs by Miranda is called Mama’s Broken Heart. It’s a song that sings about how you need to go ‘fix your makeup cause its just a break up.’ The lyrics really hit home because even when you go through a shitty break up (like I know we all have) you just have to think, “screw that guy he’s missing out.” He’s not worth the tears & move on!

In the song she sings about how her mother is telling her you should be lady like and keep it together. But her mother “grew up in a softer generation where you get a grip and bite your lip just to safe a little face.” That’s definitely not the generation we’re in now; instead woman tend to go crazy (as portrayed in the music video)!

To me I take this song as a perfect representation of our female society now. After a break up woman are allowing it to make them go crazy and feel they need to some how get revenge. How do we let it affect us so much! I am definitely guilty of letting a break up take its toll on me. After listening to this song I say we should go back to the times where it is our mama’s broken heart and we   “cross our legs, dot our I’s & don’t ever let ‘em see you cry.” Because we all know the one thing that really gets to them is seeing that we’re doing justttt fine without them.

So that’s where the name came from! It really just incorporates being a strong & classy woman. And I hope I get many of you strong ladies following me! 

{Miranda will definitely be someone I will continue to reference in this blog. PS who else was absolutely heartbroken to hear the news that her and Blake got divorced (makes me think love is a lie! haha). However I’m sure we will see Miranda being strong as ever. You go girl! }

xo,

alex-signature

MAMA’S BROKEN HEART:

 I cut my bangs with some rusty kitchen scissors
I screamed his name ‘til the neighbors called the cops
I numbed the pain at the expense of my liver
Don’t know what I did next all I know, I couldn’t stop

Word got around to the barflies and the baptists
My mama’s phone started ringin’ off the hook
I can hear her now sayin’ she ain’t gonna have it
Don’t matter how you feel, it only matters how you look

Go and fix your make up, girl, it’s just a break up
Run and hide your crazy and start actin’ like a lady
‘Cause I raised you better, gotta keep it together
Even when you fall apart

But this ain’t my mama’s broken heart

I wish I could be just a little less dramatic
Like a Kennedy when Camelot went down in flames
Leave it to me to be holdin’ the matches
When the fire trucks show up and there’s nobody else to blame

Can’t get revenge and keep a spotless reputation
Sometimes revenge is a choice you gotta make
My mama came from a softer generation
Where you get a grip and bite your lip just to save a little face

Go and fix your make up, girl, it’s just a break up

Run and hide your crazy and start actin’ like a lady
‘Cause I raised you better, gotta keep it together
Even when you fall apart
But this ain’t my mama’s broken heart

Powder your nose, paint your toes
Line your lips and keep ’em closed
Cross your legs, dot your eyes
And never let ’em see you cry

Go and fix your make up, well it’s just a break up
Run and hide your crazy and start actin’ like a lady
‘Cause I raised you better, gotta keep it together
Even when you fall apart
But this ain’t my mama’s broken heart

DIY: Rustic Farmhouse Coffee Table


I’m am currently moving into my own place for the first time! And for the past three years in college I have used this coffee table below. Through many, MANY roommates this table has seen it all! It was time for a coffee table face lift.


I decided to stain wood beams and place it on top for a rustic country chic look! Sounded simple, easy and cheap. And it truly was!

Step 1: Get the dimensions of the table.

Step 2: I went to Home Depot with the dimensions (W: 3′ 4″ L: 19″)

Step 3: I bought 8 pine beams, had them cut to the right length and it ended up costing me $24. I wanted the beams to be different widths so it wasn’t super matchy, but that was just my preference. They were extremely helpful for a new comer in the store who had absolutely no idea what she was doing. So if I can do it so can you!                                               unnamed (11)

Step 4: Find the right stain! I was lucky that my parents had just stained their front door so I was able to borrow that. The stain I used is called MinMax PolyShades Espresso. Here is a picture of the stain that I used. You can get this at any home depot for a little over $12.

Screen Shot 2015-07-21 at 11.47.21 PM

Step 5: Get ready to stain away! This was my first time staining wood and it was surprisingly super easy.

Here is what you will need: Gloves, a paint brush, the stain of your choice and some sort of stand to place the wood on (preferably something you don’t mind getting stain all over).

Next, I dipped the brush in and went at it! I recommend putting on a light coat at first and then going over it 2-3 times. I personally wanted it to be semi-light to be able to still see the wood grain.

unnamed (4)

unnamed (6)

Step 6: Let dry and grab a cold one!

unnamed (8)

Let it dry for 24 hours.

Step 7: Sand down the top of the coffee table.

unnamed (4)

Make sure to get any sand paper that is rougher than “fine.” All you are trying to do here is take off any smooth gloss that may be on top of the table. I used two sheets and for both of them I tore them into fours. I went back and forth length wise. This will allow for the wood to stick better to the liquid nails.

Step 8: If you decide to have the wood hang over the edge like I did, make sure to mark the first piece of wood you place onto the table to give you the right placement for the rest of the pieces.
unnamed (3)

Step 9: Before getting started to glue down the boards, make sure to lay out the pieces of wood in the correct order you want them on the ground next to you.

Next Grab your Liquid Nails. You can get this at Walmart! ($5.22)

Make a squiggly design on to the table.   
                unnamed (12)

unnamed (5)

Step 10: Place boards onto the glue.

 unnamed (10)        unnamed (9)

Step 11: When I was doing research on how to do this, many people showed using clamps to hold down the boards like this picture below

dscn4871

However, I am cheap and definitely didn’t have these  fancy shmancy tools.

Step 11: So for you cheapos out there like me, just find a cardboard box and something heavy!

I found some bricks in my backyard and placed them on top
unnamed       unnamed (6)

Step 12: Wait ANOTHER 24 hours. Let dry for about 4-5 hours. Here was the thing. I realized  I didn’t want to wait another day. So I did let it dry for a couple hours. Then I decided to drill screws into it to make sure it was extremely secure (and would be done that day!)

Step 13: Put in pre-drill holes using an electric drill and a drill bit. I did a row on each end and down the middle

unnamed (1)       unnamed (3)

Step 14: Drill in the screws into the pre-drilled holes

unnamed      unnamed (2)

And BAM! You have a beautiful refurbished coffee table. I love how mine turned out and cant wait to move it into my new place.

unnamed (4)

xo,

alex-signature

Hello World!

It’s official…after months of following and admiring many blogs I finally grew the balls to start my own! While this is extremely overwhelming I could not be more excited to start this journey and have my own creative space. Cant wait to share with you all!

xo, 

alex-signature